Transplanting Lilac Bushes Tips

Transplanting Lilac Bushes: A Journey to a Thriving Garden

This spring, we took on the task of transplanting a couple of our beloved lilac bushes. It was an exciting yet careful process, ensuring these beautiful shrubs would thrive in their new location. Here’s a peek into how we accomplished this with the help of some handy equipment and a bit of gardening knowledge.

The Process

Digging Up the Lilacs

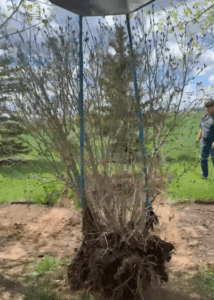
We began by digging up the bushes before the leaves fully emerged. This is crucial as plants are best transplanted while they are dormant, typically in the spring or fall. Winter transplanting isn’t feasible because the ground is frozen, making digging impossible.

Using a skid steer with a U-blade, we carefully excavated the bushes. This tool allowed us to dig deep enough to preserve the lilacs’ extensive fibrous root system, which is vital for their successful transplantation.

Transporting Lilac Bushes with Care

Once the bushes were dug up, we used a tow rope to transport them across the yard to their new home. The other side of the yard offers more room for growth, ensuring that these lilacs can spread out and flourish without constraint.

Why Timing Matters

Timing is everything when it comes to transplanting. As mentioned, the dormancy period in spring and fall is ideal because the plants are not actively growing, reducing the stress on them during the move. Lilacs, with their resilient root systems, handle transplantation quite well, making them a reliable choice for gardeners looking to revamp their landscapes.

The 10-Year Rule

This particular lilac bush was around 10 years old, a significant age in the lifecycle of garden plants. At the decade mark, flower beds often need a revamp. When we initially design flower beds, we plant with about 75% of the mature size in mind. Planting with full maturity in mind often leaves the area looking sparse and open for several years. The 75% rule strikes a balance, creating a lush appearance that pleases homeowners without overcrowding the space too quickly.

Landscaping Realities

It’s interesting to note that show homes are sometimes over-planted to create an instant, eye-catching look. This approach helps sell homes faster but isn’t ideal for long-term garden health. Such plants are often removed well before the 10-year mark.

A Growing Garden

With our lilacs now in their new, spacious location, we look forward to watching them grow and thrive. Gardening is full of these little adventures and learnings, many of which might seem trivial until you find yourself immersed in the process. Whether you’re a seasoned gardener or a beginner, there’s always something new to discover.

So, next time you’re in your garden, remember that even the most mundane tasks, like transplanting a bush, can be a step towards creating a beautiful, thriving outdoor space. Happy gardening!

Want some skilled help in transplanting bushes in your garden? Reach out to us to let us know about your next project.

lawn care tips for spring

Lawn Care Tips for Spring

As the warmth of spring approaches, it’s the perfect time to revitalize your lawn for the upcoming growing season. Here are some key tips to ensure your yard is lush and healthy.

Sharing our landscaping tips

1. Power Rake: Start by clearing away debris, leaves, thatch, snow mold, and any signs of vole damage with a power rake. This step not only enhances the appearance of your lawn but also improves airflow, which is crucial for preventing disease.

2. Aeration: Compacted soil can hinder the growth of grass by restricting access to water, air, and nutrients. Aeration involves perforating the soil with small holes to alleviate compaction and promote better root growth. This allows essential elements to penetrate directly to the root zone, fostering a healthier lawn overall.

3. Fertilization: Fuel your lawn with the nutrients it needs by applying a slow-release fertilizer. This nourishes both the blades and roots, providing the foundation for a robust and vibrant lawn throughout the season. A well-fed lawn is also better equipped to resist the invasion of broadleaf weeds, promoting a uniform and weed-free appearance.

4. Weed Control Application: Keep broadleaf weeds at bay by applying a targeted weed killer as needed. Spot treatment is effective in maintaining a healthy lawn while minimizing the use of chemicals. By tackling weeds early on, you can prevent them from competing with grass for essential resources.

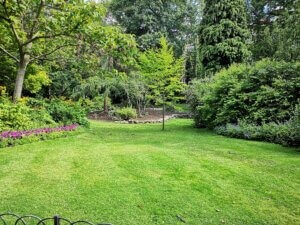
a photo of a lawn
5. Know Your Lawn: . A healthy lawn naturally suppresses weed growth, so prioritizing its overall health is key. Keep an eye on thatch buildup, the layer between the green blades and white roots, ensuring it remains below 2cm or ¾”. Excessive thatch can suffocate the grass and hinder its growth, so timely removal is crucial for maintaining a vibrant lawn.

Follow these Lawn Care Tips

By following these spring lawn care tips, you can set the stage for a season of lush greenery and outdoor enjoyment. With proper maintenance and attention to detail, your yard will be the envy of the neighborhood in no time.

Want a hand? Reach out to us about our Spring Maintenance Services.

bark mulch thickness alberta landscape plus

Using Bark Mulch in Alberta

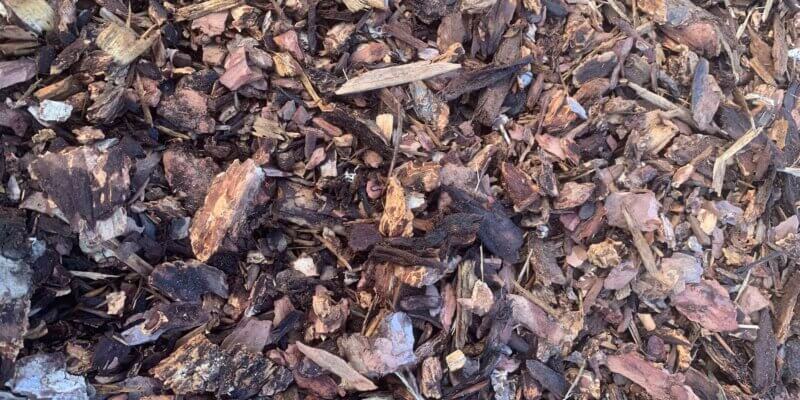
In Alberta, the recommended thickness for applying bark mulch in a flower bed is typically between 2 to 4 inches (5 to 10 cm). This thickness provides sufficient coverage to reap the benefits of mulching while allowing for proper air and water circulation in the soil.

Here are a few considerations regarding mulch thickness

Weed suppression

To effectively suppress weed growth, it is essential to apply a thick enough layer of mulch. A 2 to 4-inch thickness helps smother weed seeds and prevents them from receiving enough sunlight to germinate.

Moisture retention

A mulch layer of 2 to 4 inches is generally effective in retaining moisture in the soil. It helps reduce water evaporation and maintains a more consistent level of soil moisture, which is particularly valuable in Alberta’s climate.

Organic matter decomposition

Over time, the bark mulch will decompose and contribute organic matter to the soil. A thicker layer of mulch allows for a gradual breakdown, enriching the soil with nutrients and improving its structure.

Aesthetics and plant health

Applying a proper thickness of mulch enhances the visual appeal of the flower bed while providing insulation and protection to the plant roots. It helps regulate soil temperature, prevents erosion, and supports healthy plant growth.

It’s important to note that excessive mulch thickness can create problems such as reduced air circulation, moisture retention leading to over-saturated soil, and potential root suffocation. Therefore, it’s recommended to maintain the mulch layer within the suggested range of 2 to 4 inches for optimal results.

Kerry’s Tip: At the trunk,  start with a thin layer of mulch to allow sufficient airflow.  Moving away from the trunk, the mulch can get thicker increasing to 3-4 inches in the spaces between the plants.

Want more tips and tricks for yard and property maintenance? Follow us on Facebook!

Landscape Plus Client Showcase

Landscape Plus Client Showcase – Gagnon Residence

About the Job

This property owner worked at Landscape Plus when she was 18 and has remained in touch ever since. Her yard is in the northwest quadrant of Calgary. She loves plants and wanted to get rid of her thin awful grass. The yard is sloped towards the road so any water that lands on the yard runs off into the road.

Landscaping & Design

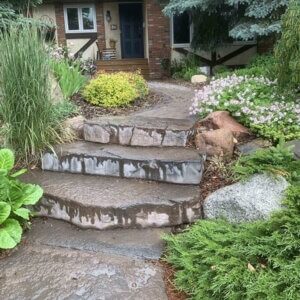
We completely gutted the yard and removed the grass etc. and leaving a few huge spruce trees and a Schubert Chokecherry. We added the large Rosetta stone steps and installed a cobblestone paver walkway with lower landing. The old stairs have a new cedar look over them and a couple of privacy panels were installed on either side property lines.

The lower level has a washed rock over a professional-grade landscape fabric so that when a vehicle is parked on the street and the passenger gets out, they aren’t stepping and juggling over plants as there is no sidewalk on this side of the street.

Plant Material & Considerations

The plant material is all hardy zone 3. Ornamental shrubs are used throughout for a year-round foundation. Then the perennials are added for an ever-changing blooming time from spring to fall. Mushroom manure was added to amend the existing depleted soil.

We used feature boulders throughout to make it look more natural and to help with any erosion that would happen when those big summer thunderstorms downpours arrive. The yard has a good thick 3“ layer of bark mulch to retain the moisture. There is also a micro irrigation head installed at the base of each plant.

The local rabbit loves to reside in the yard on a regular basis and the squirrels weren’t disturbed and continue to do life in and among the spruce trees!

Click here to check out our Landscaping Services.


Want updates on our Seasonal Services?

Click here to be added to our mailing list, we deliver an email every few months so you can get booked in early and avoid disappointment.

patio paver

Paving Stone patio, driveway or walkway

Set in Stone: Paving Stone Is An Affordable Way to Add Lasting Curb Appeal and Low Maintenance Function

Paving stones come in different colours and sizes and can be laid in several different patterns.paving stone

In the Calgary area (Strathmore, Langdon, Indus, Chestermere) we source products from reputable manufacturing companies to ensure quality. Our preferred suppliers have their options online at Belgard and Barkman. Tell us what you like; we take care of it from there!)

Surprisingly versatile, paving stones can be used for pathways, patios and driveways. The most crucial step is the preparation of the site. If this step is overlooked or rushed or ill-considered, expect problems down the road!

When you hire a crew from Landscape Plus, you can rest assured that the foundation is properly laid for a solid project that will last for years to come.

Here’s what you can expect from our crew:

  • The soil is excavated out to a minimum depth of 8″.
  • Crush gravel is used as a base material.
  • It is well tamped to make sure the base doesn’t shift in any way.
  • Once the grades have been set and the finished surface will have a sufficient slope for drainage the paving stones are laid on a bed of sand.
  • A retaining edger needs to be installed on the outside of the stone to keep them tight and avoid shifting.

And that’s just the prep work!

Finishing your paving stone patio, driveway or walkway

Once we have properly prepared the site, we get to work on the fun part, laying the patio stones into place. A polymeric jointing sand is spread and swept into the cracks while a tamper runs over the stone many times. This firms up the stone by filling in the cracks with the jointing sand. Then the patio is wet down with a mist to activate the polymeric agent and the paving stones can now be used for many years to come.

Unlike concrete, the stones can be lifted and any cracks can be filled to have a smooth surface at all times. A stone lasts for many years. The European cobble walks and roadways can attest to that! Check out some of our past projects on Facebook or Instagram.

What does it cost to get a paving stone patio, driveway or walkway?

At Landscape Plus, we typically charge $25.00* per square foot which includes the materials, labour and equipment. Click here to contact us and get a quote today!

*Price estimate for typical materials as per 2021. Rates subject to change. Travel charges may apply.